Quality printing at a bargain price
Questions? Call Us at 1.877.624.8110
Brochures Booklets Bookmarks Business Cards Calendars Carbonless Forms Catalogs Door Hangers EDDM Envelopes Gift Certificates Greeting Cards Letterhead Magnets Newsletters Notepads Plastic Cards Pocket Folders Postcards Posters Stickers
Large Posters
Vinyl Banners ![]() Rigid Signs
Rigid Signs ![]()
Face Covering ![]() Apparel
Bags
Drinkware
Food & Drink
Health
Outdoors
Technology
Writing
See More
Apparel
Bags
Drinkware
Food & Drink
Health
Outdoors
Technology
Writing
See More
Real Estate FAQs File Prep Paper Samples Layout Templates Redeem Points
About Us Client List Fundraising Program Printing Rewards Privacy Policy Referral Program Terms & Conditions Custom Pieces
Art File Preplist - please read carefully. We accept both Mac and PC files.
Output: Acrobat PDF. This is the preferred format.
Illustrator EPS, All Type To Outline.
Output: Acrobat PDF, All Type To Outline.
Output: Photoshop TIF
Output: Freehand EPS, All Type To Outline.
Output: Fireworks TIF
Output: Illustrator EPS, All Type To Outline.
Output: Quark QXD, Collect For Output.
Output: Publisher PUB., Embed All Fonts. DO NOT PACK FILES!
Output: PowerPoint PPT
Output: CorelDraw EPS, All Type To Curves.
Digitally prepared files can either streamline the production of a job, or be a real headache. If a file is good to go, the job can bypass scanning, layout and approval steps and be directly scheduled for printing. However, if digital files are prepared incorrectly, fixes and resubmissions can be expensive, time-consuming and frustrating. The success and ease of printing a digital job relies entirely on the file meeting our production requirements.
Please review the requirements below, even if you are knowledgeable in preparing digital files for other printers. All files must meet these requirements and be 100% complete. These requirements are for both disk and FTP submissions.
Art File Preplist - please read carefully. We accept both Mac and PC files..
All files should be converted to CMYK prior to submission for process color printing. We recommend using the Pantone Process or Trumatch color systems for color selection. RGB files are not compatible with four color printing using a digital press.
In most desktop publishing programs, making an image bleed is as easy as placing all images such that they extend 1/8 inch beyond the border of the page.
You can supply us a copy of each font, or authorize us to substitute a similar font that we have in our font library.
Make sure that your piece is properly laid out - with the indication of how it is to be folded - before it is put into production.
Most desktop publishing systems store a preview image in the files they create. Please remember to retrieve the original graphic file and be sure to include the images when you send the art file.
Please see the discussion of scan resolution in the Scanning and Color Correction guide. Make sure the scan is the correct size.
Industry standards tolerate 10% over or under on each job. Keep in mind printing is not an exact science and even though we start each job with 10% extra stock there is still waste. Bargain Printing has a much better average of 5% over or under. If you need exactly a certain amount please make sure to order extras.
Toll-free telephone support: 1-877-624-8110 Monday-Friday, 9am-5pm E.S.T.
If you have any questions or concerns about a proposed file format, please call us at +1 (212) 244-7504 (New York area) or Toll Free +1 (877) 624-8110, and we'll be happy to help you.
Desktop scanners and computer monitors use the RGB gamut or color system. The gamut of a color system is the range of colors that can be displayed or printed. Full color printing reproduces colors inside the CMYK color system. Not all RGB colors can be reproduced in the CMYK color system.
Most scanned photographs contain RGB colors that are within the CMYK gamut and all the colors are converted with little or no substitution when you change the image to CMYK mode. Images that were created or altered digitally, however, often contain colors that are out of gamut. You may notice a significant difference in appearance when you convert these images to CMYK.
These are the 4 Ink colors used on our presses to create a multitude of colors for excellent reproduction of photographs, illustrations and graphic designs. Please make sure all your files are in this format before submitting them to Bargain Printing.

The RGB color format is typically used by your TV or computer monitor to display millions of colors in the light spectrum. RGB files must be converted to CMYK for the offset printing process.

The optimum scanning or image resolution for supplied graphic images is 300 dpi (sometimes also referred to as pixels per inch or ppi). If the final image will be larger than the scanned original, you need additional data to produce a final image with the correct image resolution. For example, if you scan a 2 x 2" photo at 300 dpi and then enlarge the image to 4 x 4" (200%), the resolution will drop to 150 dpi (50%). To allow for this 200% intended enlargement, you would need to scan the original image at 600 dpi to ensure there is sufficient digital data in the file to achieve your goal.

"Bleed" is a printing term used to indicate the area with a background image that will be trimmed off after the file is printed and cut down to the finished size. Since the bleed area will be trimmed off during the cutting process, there should be no text or other important information in the bleed area. Projects that make use of image bleed should extend any bleeding background and/or images 1/8" over the final paper trim edge. We also recommend all other text and graphics stay inside a "Safe Zone" printing area which stays inside the final paper trim edge by about 1/4". This ensures a more professional appearance and eliminates any risk of type or images being accidentally "nicked" during trimming.

If your image has a white border on all four sides, bleeds are not required. Prepare your files at the exact dimensions of the desired output.
If your image is not white on all four sides, you MUST include bleeds in your files. Add one eighth of an inch (.25") to each dimension to allow for cutting. For example, in a 4 X 6" postcard with a full bleed, the image size should be submitted at 4.25 by 6.25" (red box above) plus .125" (1/8") on each edge of the card which will be trimmed off during the cutting process. This will leave you a 4 X 6" inch standard post card (black box above).
Your type (text) should be .25" inside of the cut box, represented by the blue safety box.
Black text should not be created out of more than one color, especially small and thin type. Printing in register is extremely difficult if black text was created out of more than one color

This illustration simulates the effect of surrounding flat black text with a rich black background.
There are essentially two colors in the logo on the right: Blue and Red.
Each color is a spot color: blue is one spot color; and red is the other spot color. If there were one more color in this graphic, then most likely it would be more economical to print it in process (also know as 4-color process or 4/c). Since there are only two, it makes sense to use spot colors.
Black is actually a color. So if you have a graphic that just uses blue and black, for instance, it's considered a 2-color job.
You can create the illusion of more colors in a job by using shades of your PMS colors: these are know as screens, shades, or tints.
Tints are created by using only a percentage of the full color, with 10% being very light and 90% being very dark. Before digital pre-press, tints were created by laying a negative with dots over the film used to shoot your artwork (this is where the term "screen" comes from: the negative with the dots was called a screen). In those days, you were pretty much restricted to percentages in increments of five per cent. Today, just about anything goes.
You can buy a color tint book from Pantone that will show you each PMS color in tints from 10 to 90%, as well as black overprinting and white reversing out of each tint. It's very handy,

In the United States, the most popular spot color system is the Pantone Matching System (or PMS). You choose PMS colors from a Pantone Swatchbook. Pantone Swatchbooks look something like the paint chips you get from hardware stores:
When you pick colors, they are always a combination of Cyan, Magenta, Yellow, and Black. When you pick a PMS color, you look through the swatch book until you see a color you like. Then you use the number.
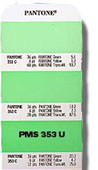
You need to be careful, because the colors are printed on both uncoated and coated paper.Coated vs uncoated stock will show a color difference even though the same PMS number ink is used. Make sure you're looking at the type of paper your final project will be printed on. Uncoated PMS colors will have a U after the number; coated PMS colors will have a C after the number. For instance, the green to match the green in my GolfScapers Logo above might be PMS 353 U.
In your software program, you'd pick the PMS color by displaying Pantone colors in your color picker or swatches, then just clicking on the same number that you've chosen from the Swatchbook.
It's important to choose the colors from the PMS Swatchbook, and not from your monitor. Unless your monitor is very carefully calibrated, the color may look very different than the actual printed color (we're back to that RGB vs spot color thing). Trust the Pantone Swatchbooks. While the printed color can and will vary from what you see in the Swatchbooks - paper, press operators, etc. can make a difference in the appearance of an ink color - it should be close, and it can be corrected on press to some degree.
If you're placing EPS graphics (including DCS images) into a layout, the color names used in the graphic will be added to your color list when you place the graphic. If you can do this early on, it can help ensure that your color names are consistent.
QuarkXPress: Edit/Define Colors... Click New. Under model, select an appropriate PANTONE library. Select the color you wish to use.
Adobe Illustrator: Window/Swatch Libraries... lets you open an appropriate PANTONE library. Drag the desired color(s) into your document's swatch palette. Version 6 – File/Import styles... and select the appropriate PANTONE library document from the Utilities/Color Systems folder. Or open the file; colors from any open document are available in all open documents.
Tip: Before you save your file, Select All Unused swatches and delete them. This will help reduce the number of unneeded spot colors that show up in your layout.
Photoshop has a few different ways of handling spot colors
Image/Mode/Bitmap or Image/Mode/Grayscale: You can assign colors to grayscale and bitmap TIFFs in QuarkXPress, or FreeHand. Simply save as TIFF. Only the first channel will be used.
Image/Mode/Duotone: From the Duotone dialog box, click a color swatch to show the color picker; click the "Custom" button to show the list of PANTONE color names. Remember to use "Black" not "PANTONE Process Black CV".
Image/Mode/Multichannel: (new feature in version 5) Each channel's name is its spot color. In the Channel Options dialog, click the color swatch to show the color picker; click the "Custom" button to show the list of PANTONE color names.
The only thing that matters when creating color separations is the name of the color. "PANTONE 241 CV" and "PANTONE 241 CVC" are two different colors. Capitalization is important, too: "Pantone 241 CV" would be a third color.
Note that the different applications use different versions of the PANTONE color names, depending on which PANTONE libraries they know. If your programs don't agree, you'll have to change the color names yourself so that they match.
Be particularly careful about black in Photoshop Duotones and spot color channels. Don't select "PANTONE Process Black CV" from the custom color list unless you later change the name to simply "Black". QuarkXPress has "Black" as a permanent color and will treat "PANTONE Process Black CV" as a separate spot color.
Also, it really doesn't matter what the name is. You're welcome to create your graphics with descriptive names like "Peach" or "Purple" just as long as you're consistent.
Tip: There's a magazine that uses a different highlight color each issue. Rather than always have to edit their logo graphics, etc., they have consistently named the spot color "Color". When they get to press, we simply separate "Black" and "Color" and mix whichever ink they've requested this time.
Probably not, unless you need a composite color proof to reflect the change. We can simply separate the colors according to the old names but use whichever inks you specify on press.
In this case, you might find it easier to simply set everything up as black. Of course, if you make a composite color print, you won't see the correct final color.
Yes, most definitely. Printing with spot color is actually a little more difficult than printing with process color because the software is so picky about color names. Check to make certain that each element appears on the correct separations and that you have only one separation printing for each ink. We don't need to have the separations, You should use them as a guide.

Convert fonts to curves or outlines where possible. Include font files for all other situations.
Some of these programs allow you to "convert fonts to curves or outlines". This is preferred, wherever possible, to eliminate any issues surrounding fonts used in your project. Where the software does not support this feature, please make sure you INCLUDE ALL FONTS when sending your files.
Windows® users must save text as curves (Illustrator or Mac Format when available). Look for this option when exporting your file. Graphics and text must be properly sized and in position.
Mac users must save text as curves whenever possible. Look for this option when exporting your file. Mac users must include both the screen display and printer extension portions of ALL fonts used in both graphic and typeset documents. TYPE 1 fonts only, no True Type fonts or we will have to substitute fonts. Fonts must be included each time an order requiring them is placed. During the pre-press stage, your font(s) will be temporarily used for proper output then they will be discarded.
The following is an explanation of different brochure folds. A template for each of these folds is available from the downloadable templates. Use this page as a guide to decide which template is best for you.
This template represents a two-panel folding brochure. panel size is 4"x9". Document size is 8"x9".
This template represents a three-panel trifold brochure. Panel sixe is 4"x8.375". Document siZe is 11.937"x8.375" with one panel adjusted for trim and fold.
This template represents a two-panel folding brochure. panel size is 4"x9". Document size is 8"x9".
This template represents a two-panel folding brochure. panel size is 4"x9". Document size is 8"x9".
We know that the process of preparing and sending your artwork can be a complicated and sometimes frustrating experience. And we are here to help! If you have any questions, Please feel free to call us @ 1.877.624.8110
Files from unsupported software programs need to be submitted in TIF, EPS or JPG format (TIF or EPS are preferred, as the JPG format uses a "lossy" form of compression which discards data in order to save space).
Collect and assemble files, fonts & images into single compressed file - ZIP (for PC) or SIT (for Mac) - and use WinZip or similar PC based software to bundle all your project components, including fonts and graphic images, into a single compressed ZIP file. On the MAC, use Stuffit to create a SIT file (DO NOT make the file into a self extracting SEA format).
Instructions on saving and sending us your files are detailed below. Please follow the outlined steps very carefully. There may be several ways or options for saving and sending us your files, but not all of them result in a printable format. Following our procedure exactly will greatly increase your chance of success with predictable results.
Convert to TIFF [preferred] or JPEG Format. To convert your Photoshop files to either of these formats, follow these steps carefully -
Convert to EPS Format
Convert to EPS Format.
Convert to EPS Format - Corel version 9 or 10 only.